This post may contain affiliate links which means we might earn a small commission if you decide to make a purchase through them (at no extra cost to you). Need more info? Click Here
There’s a messy house and then there’s a filthy house – and the difference between the two? The degree of eww and yuck! And it is incredible how quickly a filthy house can sneak up on you. It is very frustrating and depressing living in a house that always seems dirty and messy and it feels like no matter what you do, it just seems to keep getting worse.
Sometimes it feels like the dirt just refuses to budge and no amount of scrubbing can get it out of the cracks. The same is true of the filth that collects in the corners of the bathroom, the crevices of the kitchen sink, and the nooks and crannies of the bathroom sink. And if you’ve ever spent more than a few minutes cleaning your house, you know it can feel like a never-ending job.
However, the good news is that with a little bit of planning and effort you can deep clean a filthy house and get the dirtiness and filthiness under control. And once it is deep cleaned and decluttered it will be a lot easier to keep it under control in the future.
But sometimes, the hardest part is knowing where to start. That’s where this article comes in. This guide will give you ideas on where to start deep cleaning your filthy house so that you can get rid of the filth and dirt and keep it under control.
If you find this cleaning guide helpful, please consider pinning it 🙂

Why Should You Deep Clean Your Filthy House
There are many good reasons to deep clean a filthy house—not only will it make your home safer, but it will also help to keep your air clean (think fewer allergies!) and it will also be a lot more comfortable for you and your family. Cleaning a dirty or even filthy house will also help to prevent mold and mildew from growing, which can be dangerous. It will also make your home look better and decrease stress levels, making you a happier and healthier person!
How To Clean A Filthy House
Although deep cleaning a messy or filthy house can seem overwhelming and daunting it really doesn’t have to be. With a plan in place, it will be a lot easier to get everything done. But before beginning, you need to make sure that you have all equipment and household cleaners that you will need to help you get the job done.
Cleaning Supplies and Equipment
There are a few things that you will need before you begin. Here is a list to get you started:
- Gloves
- Black refuse bags
- Step ladder
- Vacuum cleaner
- Broom
- Microfibre Cloths
- Small brush / old toothbrush
- Dustpan and brush
- Sponges and cloths
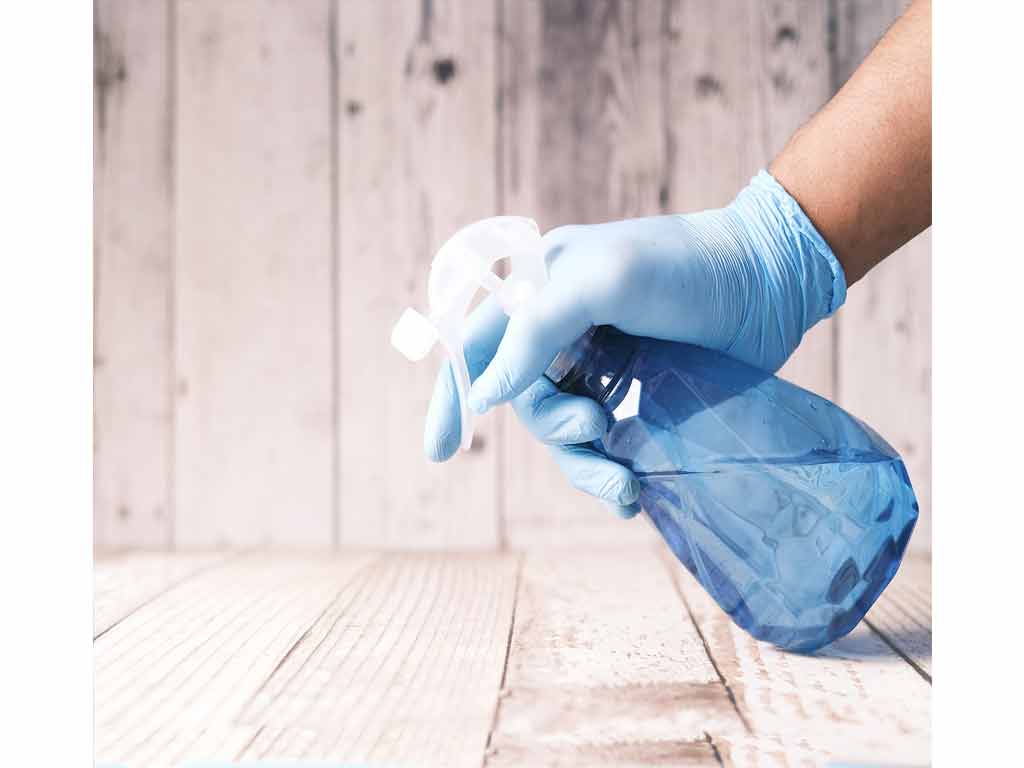
- Spray Bottle
- Mop
- Bucket
- Paper Towels
- Feather duster / Microfibre extendable duster
- Sugar soap
- White vinegar
- Baking soda
- Old wire coat hanger / Drain Millipede (to clean filth and hair out of drain pipes)
- Heavy-duty cleaner (if needed)
Where to Start
Choose a single room or area to begin deep cleaning. Don’t overwhelm yourself by tackling a big area when you first start! Obviously, if you are cleaning a filthy house that isn’t lived in, it will be a whole lot easier to clean. If you are deep cleaning a house that is lived in then it is a bit more difficult just because you will need to move furniture etc. We will assume that we will be cleaning a house that is lived in.
Step 1 – Declutter
Once you have chosen an area or room to begin with, the first step is to declutter. In our previous article about how to declutter your home, we talked about how to declutter a house quickly and easily and created a checklist to help you.
In summary:
- Get rid of “no-brainer” clutter such as paper, magazines, junk, etc. Throw all these things away… don’t think, just get rid of them!
- Remove anything that doesn’t belong in the area you are cleaning, for example, clothing in the bathroom.
- Remove anything that is broken or damaged.
- Remove anything that you don’t want anymore.
- Remove anything that is outdated and that does not fit in with your interior design or color scheme.
I can’t stress enough how important it is that you declutter before you even start trying to deep clean a filthy house – it probably is the most important step! You can’t give your house a thorough deep cleaning if you are trying to clean around junk and clutter. And ultimately, removing all the clutter will make your home a whole lot easier to keep clean in the future. Win-win!
Step 2 – Wash Anything That Is Machine Washable
Each room will have items that you can easily wash in your washing machine. So while you are busy cleaning throw these things into the washing machine while you work. These include things like:
- Cushion covers
- Duvet covers
- Curtains
- Small throw carpets
- Throw blankets
- Furniture covers
Step 3 – Remove Furniture & Fittings
Your goal is to try to make the room as easy as possible to deep clean. So if possible, remove anything that can be moved out of the room or area such as:
- Furniture – If your furniture has fabric covers that can be removed then now is your chance to throw them into the washing machine.
- Curtains or blinds – If you have curtains in the room you are cleaning remove them and throw these into the washing machine as well.
- Loose carpets
- Light fittings
- Curtain railings
If you can’t move the furniture out of the room then move it to one side of the room, preferably away from the windows to begin with.
Step 4 – Start At The Top
The easiest way to deep clean a filthy house is to start at the top and work your way down.
1. Use your feather duster to clear away any cobwebs in the corners of the room and along the cornices. You can also use the feather duster to dust the ceiling and the top of the curtain railings and any light fittings.
2. If you have a ceiling fan in the room then clean this as well.
3. If it is possible to remove the light fittings, then rather remove them before cleaning instead of trying to clean them from your step ladder.
4. If you can’t remove the curtain railings then clean them now.
5. Next, use sugar soap to clean the walls. Don’t clean the wall under the windows just yet. You can also use the sugar soap to clean closet doors as well as any shelves on the wall. If you have managed to clear out your closets before starting then now is a good time to also wipe down all the shelves inside.
6. After you have cleaned the walls, ceiling, shelves, closets, and cupboards, you can now start cleaning the windows. Start by cleaning the window frames. Once the window frames are clean then you can start cleaning the windows themselves.
How To Clean Windows
Your grandparents were right! One of the best ways to clean windows is with newspaper. Mix equal parts vinegar and water into a spray bottle and then spray the mixture onto the windows. Scrunch up your newspaper into a ball and wipe the windows in a circular motion to loosen up any dirt. The liquid will be absorbed into the newspaper. When the dirt has been loosened use the newspaper to wipe the windows horizontally and then vertically to make sure there are no streaks.
While the newspaper method works really well it is very time-consuming and it can be exhausting depending on how many windows you need to clean. If you are looking for an easier way to clean the windows quickly then you can try using a squeegee. You can also use your vinegar mixture with your squeegee, just make sure that you wipe your squeegee blade clean after every stroke to prevent streaks. Of course, you can also use the newspaper method along with the squeegee if you need to.
We recently came across an awesome alternative to the newspaper and squeegee methods for cleaning windows. The Rendasun Window Cleaning And Enviro Cloths simply use water to clean your windows leaving them streak-free without the use of chemicals. The cloth has a 4.8-star rating on Amazon with great reviews. Not only does it clean windows but it also cleans everything from mirrors to computer monitors to granite countertops. And they are machine washable!
Once the windows are clean then you can go ahead and clean the wall underneath the window.
7. If you are deep cleaning the bathroom or the kitchen you can now go ahead and clean the sink, toilet, basins, baths, showers, taps, mirrors, etc. You may need to give the walls a quick wipe after doing so if they have gotten a little dirty while cleaning these things.
8. Clean the skirting boards around the room.
9. Now, the only thing left to do is to clean the floors. How you clean will depend on the type of floor you have. Any type of tiled or laminated floor should be relatively easy to clean.
If the carpets are particularly filthy, then it may be a good idea to hire a commercial carpet cleaner to help you deep clean the carpets. However, if the carpets aren’t too bad, then you can use your vacuum cleaner to clean them.
How To Remove Stains From A Carpet
An easy DIY way to remove stains from your carpets is to use vinegar and baking soda. sprinkle baking soda onto the stain making sure that you cover it. Then pour a little vinegar onto that and you should hear the mixture start to fizz. If you hear the fizzing then you have enough vinegar on the stain. Use a brush to rub the mixture into the carpet and let it sit until the spot is dry. When it is dry then you can go ahead and vacuum up any of the remaining baking soda.
How To Deodorize A Carpet
One of the easiest ways to deodorize your carpet is to use baking soda. Simply sprinkle a generous amount of baking soda onto your carpet and use a broom to gently disperse it into the carpet. Ideally, leave the baking soda on the carpet overnight and then vacuum up the next morning. Remember to wear shoes if you will be walking on the carpet.
10. By now the room you are working on should be clean! Check if you have missed anything and if you have then go ahead and clean it.
11. Once the room is spotless and the floors are dry, you can now go ahead and begin moving things back into the room.
12. If there are fittings such as curtain railings, blinds, light fittings, etc that you removed, now is the time to put them back up. Make sure that they are dusted and cleaned before doing so.
13. Move the furniture back into the room. Again make sure that everything is dusted, polished, and cleaned before doing so. If you weren’t able to initially move all the furniture out of the room then you will need to clean the room section by section moving the furniture into the center of the room when you are doing the walls and the windows.
14. Once your furniture is back in the room, you can hang your curtains again.
Now that your room is sparkling clean you can move on to the next room or area. Because the kitchen and bathroom are a bit trickier to deep clean we will look at these two rooms separately.
Related: 10 Best Steps and Tips to an Organized Closet
How To Clean A Filthy Kitchen
The kitchen is probably one of the most important rooms in your house to keep clean. The kitchen is the room where family meals are cooked and often eaten so it is important that it is clean and hygienic. The kitchen is also the room where the food is stored so it is important that it is kept free of germs and bacteria.
Just like the other rooms in the house, you first need to declutter your kitchen and get rid of everything that doesn’t belong there. Use our Declutter Your Home Checklist to help you get started.
The best way to declutter the kitchen is to:
- Unpack the pantry and each kitchen cupboard throwing away any food items that have expired or that you don’t use. Don’t forget the clear out and organize the kitchen drawers!
- Likewise, get rid of any small appliances or kitchen gadgets that are broken or that you don’t use anymore.
- The same goes for crockery, cutlery, or anything else that you haven’t touched for at least 6 months.
- Don’t forget to clear out the cupboard under the sink getting rid of any old household cleaning products that are no longer needed or have expired. Again, if you haven’t used something in 6 months rather get rid of it.
- Clean out the refrigerator and freezer and remove any old or expired foods.
- Remove any appliances that are easy to move such as the microwave.
If your kitchen is really filthy then it might be a good idea to completely unpack all the cupboards and remove everything from them before attempting to deep clean the kitchen.
Now that the kitchen has been cleared of clutter it’s time to start cleaning!
1. Just like the other rooms in the house, start from the top and work down. Remember to remove the curtains or blinds before you start.
2. If you can, move your appliances towards the middle of the room to make it easier to clean around them.
3. Use your feather duster to dust the corners, walls, and ceiling. Use your step ladder to dust and clean the top of any cupboards or shelves. Use a damp cloth to help remove any lingering dust or dirt that you find.
4. Clean the kitchen windows, window frames, and curtain railings.
5. Clean each cupboard on the inside and then move to the outside. Clean and disinfect all the countertops as you go. Don’t forget to clean the kitchen drawers and kitchen sink as well!
6. Clean the walls with sugar soap if they are also dirty. If they aren’t too bad then simply use a damp cloth to wipe them down.
7. Clean the appliances. Give each appliance a good clean. Remember the top of the fridge and freezer!
8. By now your floor is going to look like an absolute nightmare! The floor can be a bit tricky because you still need to get all your appliances back into position. The easiest way to do this is to give the floor a quick once-over clean. when the majority of the dirt is gone then give the areas where the appliances are going to stand a good clean. Once this is done, go ahead and push the appliances back into their original positions.
9. Before cleaning the rest of the floor, it is now time to repack the cupboards and bring back all the small appliances and equipment you removed earlier.
10. Just like the rest of the house, don’t bring anything back into the kitchen that is dirty. If you need to, wash any dusty or dirty dishes and clean any small appliances and equipment before bringing them back into the kitchen.
11. Once everything is back in place, you can go ahead and clean the rest of the floor.
Deep Cleaning A Filthy Bathroom
The bathroom can arguably be one of the yuckiest rooms in the house. And it’s probably the one that the whole family will want to avoid cleaning! Especially when it comes to the loo. Because the bathroom is often moist and dark it is the perfect place for mold and mildew to grow.
1. First things first, remove the towels, washcloths, and curtains from the bathroom and throw these into the washing machine. If you have bathmats that can be machine washed then wash these as well.
2. Just like the other rooms in the house, you need to start by decluttering and clearing out the bathroom. Remove everything that doesn’t belong and clear out the bathroom cupboards and vanities removing everything from razors to shampoo bottles.
3. Throw away anything that is old, stained, rusted or that looks like it is unhygienic such as old sponges, loofahs, washcloths, and towels.
4. Once you have cleared everything out of the bathroom you can start cleaning! Just like the other rooms, start from the top and work down. There could be areas that will need extra attention but if you can get the majority of the filth clean then the rest becomes a bit more manageable.
5. Remember to clean the inside of the bathroom cupboards and vanities as well. And don’t forget the windows!
6. Once you have cleaned the majority of the bathroom you can start to clean specific trouble spots such as the shower and toilet.
How To Clean The Shower
There are a few areas of your shower that are candidates for a deep clean.
How To Clean Shower Curtains
If your shower has curtains and they aren’t completely filthy then it is usually quite easy to clean them – they aren’t too expensive though so if you feel that you need to replace them then do that. However, if you would like to keep them, they are easy to wash in the washing machine (check the care instructions on their tag to be sure).
Remove the shower curtain from its rings or connectors and put it in the washing machine. Add your normal washing detergent with two tablespoons of baking soda and wash on a gentle cycle in warm water. You can add a quarter cup of vinegar to the rinse cycle for extra cleaning power! Adding a couple of old towels to the washing machine along with the shower curtains will help to clean them even more.
How To Clean The Shower Walls And Door

Nowadays there are many different types of shower walls available including tiles, fiberglass, and stone. For any type of natural shower walls such as stone, you will need to check if there are specific cleaning instructions for them.
For tile and fiberglass showers, start by running the shower for about 3 to 5 minutes letting the water get as hot as possible. This will help soften any built-up gunk and filth in the shower.
Depending on how filthy the shower is you can use a solution of one part water and one part vinegar to do the cleaning.
After the hot water has been running for about 5 minutes turn it off and let the shower drain. Spray the shower walls and door with your vinegar solution. don’t be shy, spray everything down generously and then let it stand for a few minutes. If you can’t stand the smell of the vinegar then you can add a few drops of dishwashing liquid to the solution. After a few minutes, wipe the shower walls and door down with a soft cloth or sponge. You can use a squeegee to help clean off the shower doors.
How To Clean The Shower Head
It’s easier than you think to clean the shower head! Once again, vinegar to the rescue! Remove the shower head then simply soak it in the vinegar solution to clean it. The vinegar helps to break down all the grime making wiping it clean afterward a lot easier.
If you can’t remove the shower head, then tie a plastic bag around the shower head and fill it with vinegar to let it soak.
In both cases, the time needed will depend on how filthy the shower head is.
How To Unclog The Shower Drain
You can unclog the shower drain by using an old wire hanger or a Drain Millipede. Simply remove the drain cover and using pliers, bend the end of the wire hanger to form a hook at one end. Push the hanger into the drain and pull it back out. Don’t be too grossed out by the muck that comes out of the drain! Repeat a couple of times to make sure the drain is clear. Use your vinegar solution to clean the drain cover before replacing it.
If you notice that your shower drain is a bit smelly then you can use a mixture of vinegar and baking soda to clean it. Mix at a ratio of one part baking soda to two parts vinegar and pour into the drain. Let it sit for about half an hour and then flush it with hot water.
How To Clean The Shower Floor
When the rest of the shower is clean it is time to tackle the shower floor. If you find that the vinegar solution isn’t sufficient you can use the baking powder and vinegar solution to clean the shower floor as well.
How To Clean The Toilet
Now it’s time to tackle cleaning the toilet! To make your toilet extra sparkly and clean you can once again use vinegar and baking soda! Add about a cup of vinegar to the toilet bowl and use your toilet brush to mix it with the water. Next, add about a cup of baking soda to the water, followed by another cup of vinegar. You will notice the solution will fizz. Let this mixture sit for about 15 minutes to half an hour and then give your toilet a good scrub with the toilet brush. If needed you can let the mixture sit for longer before giving it another scrub and then flush.
While the mixture is in the toilet bowl you can tackle the rest of the toilet. If you need to you can remove the toilet seat to get to any hard-to-reach places.
How To Clean The Bathroom Sink
Just like the shower drain, the bathroom sink can collect a lot of gunk over time. Everything from soap to toothpaste, to hair to makeup, can get caught up in the drain. As with the shower drain, you can use an old hanger to remove anything that is caught in the drain.
Once the drain is clear you can use the vinegar solution to clean the rest of the sink. Use an old toothbrush to help you clean around the taps.
How To Get Rid Of Mold And Mildew Stains
Unfortunately, there are always going to be a couple of things that will be a little harder to clean, mould is one of these. If you have any stubborn mold stains that you haven’t been able to remove then you can make a paste out of baking soda and water. Apply the paste to the mold stain and let it sit for at least four to five hours after which you can rinse it off and the mold stains should be gone.
How To Clean Grout
If the grout between your tiles is looking a little dirty then you can use a baking soda and bleach paste to clean them. You will need three parts baking soda to one part bleach for the mixture. Apply it to the grout and leave it for 30 minutes to an hour to work its magic. When done, use a scrubbing brush or cloth to wipe away any paste that is left behind.
How To Clean Bathroom Mirrors
An easy way to clean bathroom mirrors is to use your vinegar, dishwashing liquid, and water solution. Simply spray the mixture onto the mirrors, let it sit for a couple of minutes, and then wipe it clean with a microfibre cloth or even a newspaper for streak-free mirrors. If you have bathroom sconces, you will need to clean these with a soft cloth.
Once you have cleaned every nook and cranny of your bathroom, make sure it is properly dry before moving everything back in. As with the other rooms, make sure that everything you bring back into the bathroom is cleaned properly before bringing it back in.
Need More Inspiration?
Decluttering Tips for Sentimental Items
The KonMari Method: Decluttering Your Home with Joy!
Decluttering Your Home Office for Enhanced Productivity!
Decluttering Your Digital Life: Managing Email and Files
The Art of Downsizing: Making Room for What Matters!
A Quick Beginner’s Guide to Minimalist Living!
Conclusion
Deep cleaning a filthy house is not an easy task and it can seem daunting especially if you have a lot going on at home and at work. And if the thought of tackling the filth makes you feel depressed it can feel even worse! However, sometimes the hardest part is just getting started! If you are faced with a filthy house and are not sure how to start, choose a small, easy area and clean it first. This will make deep cleaning the rest of the house much less daunting.
The good news is that once you have deep cleaned your home and it is uncluttered and clean, it will be a lot easier to keep on top of everything that needs to be done to keep it that way. And remember, it is important to get your family to help out when it comes to keeping your house clean and uncluttered. Setting up a cleaning schedule is a great way to keep on top of things and to get your family involved.
And once your house is beautifully clean, why not look at doing a little decorating? Our color scheme generator will give you lots of color scheme inspiration if you don’t know where to start!
Happy cleaning!

